IBM iSeries Navigator is a rich client tool to work with DB2 database in AS400 machines. From your Microsoft Windows client machines through iSeries Navigator you can connect to remotely located DB2 database and work with it as simple as work in Microsoft Access database. You don't need work with console or do lot of coding which always lead to errors. Using iSeries Navigator you can very quickly develop you database and manage it very effectively.
Login
First step is to login to AS400 machine through iSeries Navigator. You need to provide server name, user id and password.
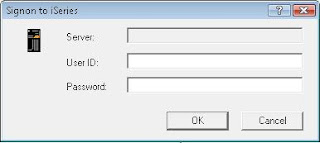
Fig 1: Login iSeries Navigator
Once you successfully login to the system in "Environment" pane it will list down all the entities that you can manage through iSeries Navigator UI. This list will vary based on the access permission to the connected AS400 server. In this article will discuss on how to work with SQL tables through the Navigator. At the end of the article you will realize how you can save your time by using iSeries Navigator for database management rather working on console window.
Work with SQL tables in DB2 database through navigator you need to select "Databases" section. Under Databases section you will have Schemas, Database Navigator Maps, SQL Performance Monitors, SQL Plan Cache Snapshots and Transactions.
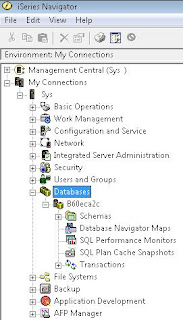
Fig 2: Databases in iSeries Navigator
Under schemas section it will list down all the database schemas or different databases in the server. Database Navigator Maps is a graphical tool to visualize the database design. It is shown database tables, constraints and relationships or references in graphical notations. Database Navigator Maps can be used to manage your database as well. SQL Performance Monitors can be used to monitor and fine tune the database design. Transactions section shows Database Transactions and Global Transactions.
Select Schemas to Display
Select Schemas to Display
Expand the Schemas section to see the database you have already in the server. If it not listed your particular database you can add that database to navigator by using "Select Schemas to Display" option. Right click on the Schemas and select "Select Schemas to Display".
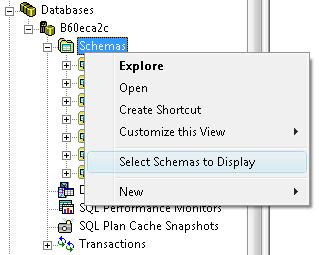 Fig 3: Select Schemas to Display
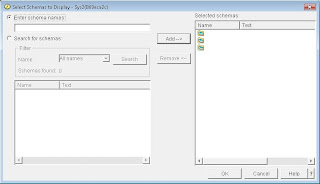
Fig 4: Select Schemas to Display Window
Create New SchemaIf you want to create a new database or schema, right click on Schemas and select "New -> Schema". Specify a name for the new schema, whether it needs to add to displayed list of schemas and create as standard library. "Create in" is the system pool that you want to create your database in. "Text" is to discribe shortly your database for operator's purpose.
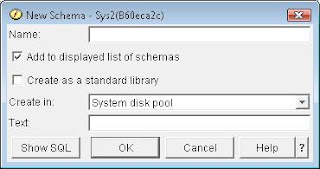 Fig 5: New Schema Window
Create New Table
Once your database schema is listed under Schemas section, select the database that you want to work with. It will display all objects belong to the selected database such as aliases, constraints, distinct types, functions, indexes, journal receivers, journals, procedures, sequences, SQL packages, tables and views. Select "Tables" from the tree view and right hand side pane will display all the tables in the database. Right click on Tables and select "New -> Table" to create new table in the database.
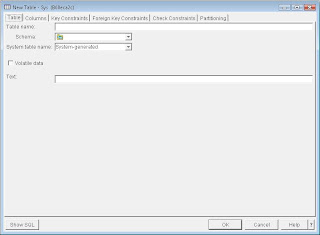 Fig 6: Create New Table Window
In New Table window specify the table name, schema and system table name and text. System table name is used to identify the table in the system. Text is to describe the table purpose. Use "Volatile Data" check box if the table need to be volatile.
Add Column to Table
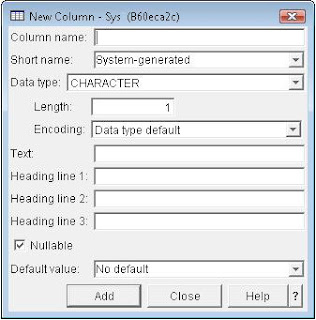 Fig 7: Create New Column Window
Specify Column name, Short name for system purposes, Data type, Text and Heading for new column. Data type drop down list shows all the data types that you can use for your purpose. Click "Add" once you enter all the details to add the column into table.
Comments
Post a Comment