Getting Started With PrimeNG Styling in Angular App
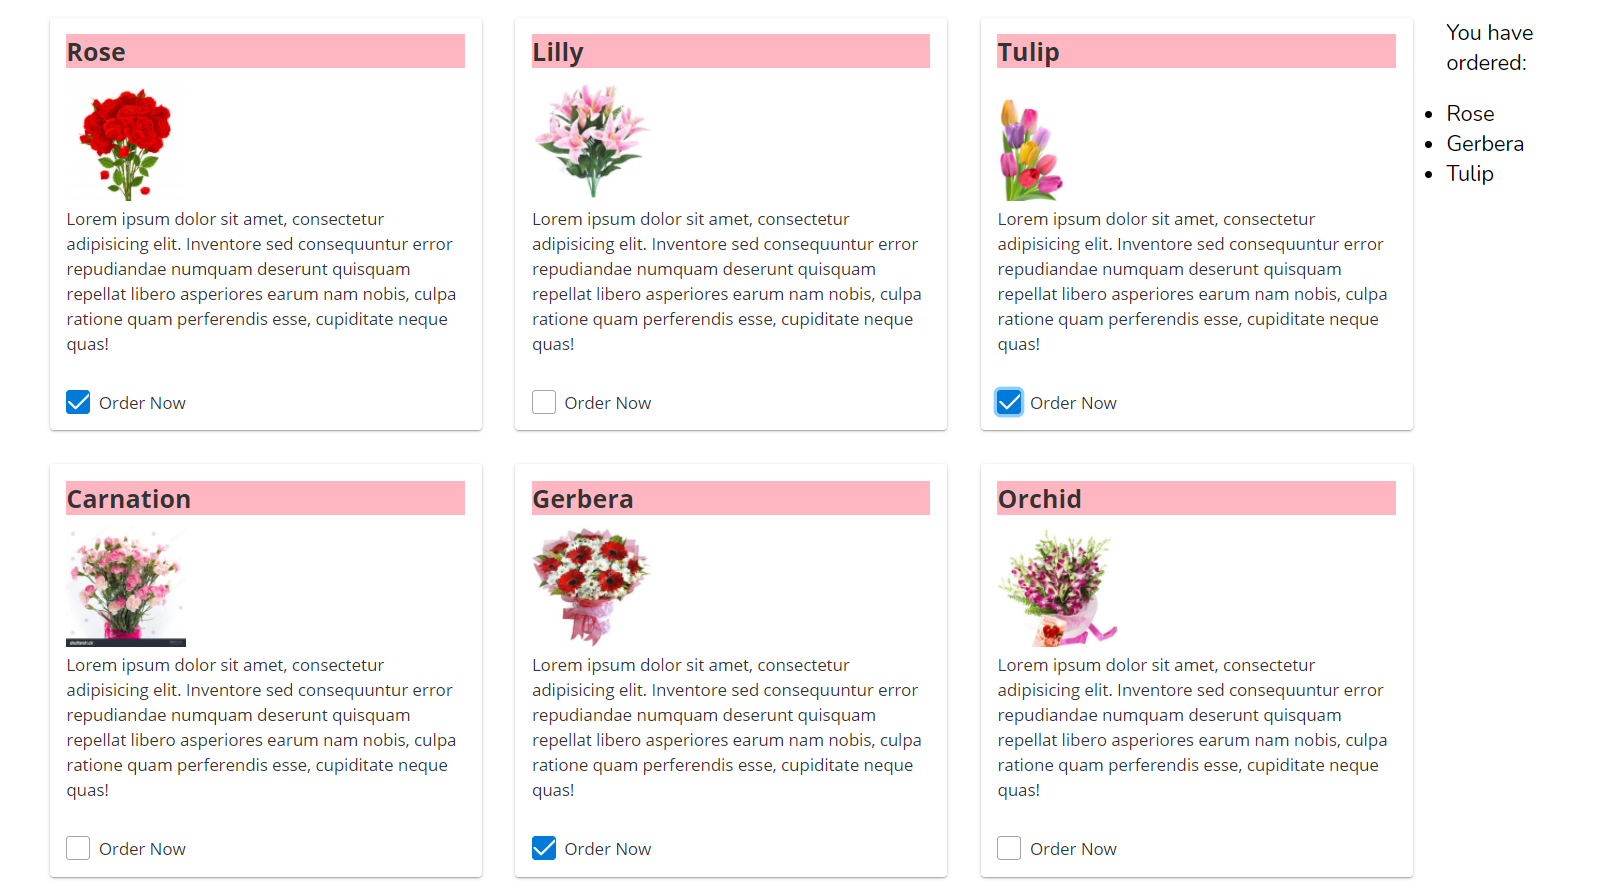
This chapter I am planning to show how you can handle events of the checkboxes. For that I will use checkbox for every card to place the order.
To use PrimeNG checkboxes you have to import checkbox module in app.module.ts file.
import {CheckboxModule} from 'primeng/checkbox';import { BrowserModule } from '@angular/platform-browser';
import { NgModule } from '@angular/core';
import { AppRoutingModule } from './app-routing.module';
import { AppComponent } from './app.component';
import { LandingComponent } from './modules/landing/landing.component';
import { HomeComponent } from './modules/home/home.component';
import { CardModule } from 'primeng/card';
import {CheckboxModule} from 'primeng/checkbox';
@NgModule({
declarations: [
AppComponent,
LandingComponent,
HomeComponent
],
imports: [
BrowserModule,
AppRoutingModule,
CardModule,
CheckboxModule
],
providers: [],
bootstrap: [AppComponent]
})
export class AppModule { }
Then you must import checkbox module inside your component.ts file to use it inside the html template.
import { Component, OnInit, ViewEncapsulation } from '@angular/core';import { flower } from '../../domain/flower';import {CardModule} from 'primeng/card';import {CheckboxModule} from 'primeng/checkbox';
@Component({  selector: 'app-landing',  templateUrl: './landing.component.html',  styleUrls: ['./landing.component.scss'],  encapsulation: ViewEncapsulation.None})export class LandingComponent implements OnInit {
I have added checkbox PrimeNG component inside my flower card as below.
<h1>Welcome to my flower store</h1>

<div *ngFor="let flower of myFlowerList;trackBy:trackFlowers">
        <p-card header="{{flower.name}}"  [style]="{width: '360px','float':'left','margin-bottom': '2em','margin-right': '2em','background-color':'light-pink'}" styleClass="p-card-shadow">
                <img alt="Card" width="100" height="100" src="assets/stock/{{flower.name}}.jpg">
            <p>Lorem ipsum dolor sit amet, consectetur adipisicing elit. Inventore sed consequuntur error repudiandae numquam deserunt
                quisquam repellat libero asperiores earum nam nobis, culpa ratione quam perferendis esse, cupiditate neque quas!</p>
                <p-checkbox name="flower" [style]="{'margin-top': '2em'}" value="{{flower.name}}" label="Order Now" [(ngModel)]="selectedFlowers"></p-checkbox>

            </p-card>
    </div>
As a checkbox value I set the name property of flower object
value="{{flower.name}}"
[(ngModel)] directive is supporting two-way binding in angular.
Two-way data binding in Angular will help users to exchange data from the component to view and from view to the component. It will help users to establish communication bi-directionally.
In order to use ngModel directive we must import the FormsModule from @angular/forms in app.module.ts file as shown below.
import { BrowserModule } from '@angular/platform-browser';
import { NgModule } from '@angular/core';

import { AppRoutingModule } from './app-routing.module';
import { AppComponent } from './app.component';
import { LandingComponent } from './modules/landing/landing.component';
import { HomeComponent } from './modules/home/home.component';
import { CardModule } from 'primeng/card';
import {CheckboxModule} from 'primeng/checkbox';
import { CommonModule } from '@angular/common';
import { FormsModule }    from '@angular/forms';

@NgModule({
  declarations: [
    AppComponent,
    LandingComponent,
    HomeComponent
  ],
  imports: [
    BrowserModule,
    AppRoutingModule,
    CardModule,
    CheckboxModule,
    CommonModule,
    FormsModule

  ],
  providers: [],
  bootstrap: [AppComponent]
})
export class AppModule { }
If you don’t import it you will get the template binding as below in your console.
Uncaught Error: Template parse errors:
Can't bind to 'ngModel' since it isn't a known property of 'p-checkbox'.
1. If 'p-checkbox' is an Angular component and it has 'ngModel' input, then verify that it is part of this module.
2. If 'p-checkbox' is a Web Component then add 'CUSTOM_ELEMENTS_SCHEMA' to the '@NgModule.schemas' of this component to suppress this message.
3. To allow any property add 'NO_ERRORS_SCHEMA' to the '@NgModule.schemas' of this component. ("<p-checkbox name="flower" [style]="{'margin-top': '2em'}" value="{{flower.name}}" label="Order Now" [ERROR ->][(ngModel)]="selectedFlowers"></p-checkbox>
After that in my component.ts file I have defined the array to use in two-way binding.
import { Component, OnInit, ViewEncapsulation } from '@angular/core';
import { flower } from '../../domain/flower';
import {CardModule} from 'primeng/card';
import {CheckboxModule} from 'primeng/checkbox';

@Component({
  selector: 'app-landing',
  templateUrl: './landing.component.html',
  styleUrls: ['./landing.component.scss'],
  encapsulation: ViewEncapsulation.None
})
export class LandingComponent implements OnInit {

  myFlowerList:flower[]=[];
  selectedFlowers: string[] = [];
  constructor() { }

  ngOnInit() {
    this.mySellingFlowers();
  }

  mySellingFlowers(){
    let rose = new flower();
    rose.name = "Rose";
    rose.price = 100;
    rose.availableQuantity = 1000;
    this. myFlowerList.push(rose);

    let lily = new flower();
    lily.name = "Lilly";
    lily.price = 80;
    lily.availableQuantity = 2000;
    this. myFlowerList.push(lily);

    let tulip = new flower();
    tulip.name = "Tulip";
    tulip.price = 100;
    tulip.availableQuantity = 2300;
    this. myFlowerList.push(tulip);

    let carnation = new flower();
    carnation.name = "Carnation";
    carnation.price = 50;
    carnation.availableQuantity = 1500;
    this. myFlowerList.push(carnation);

    let gerbera = new flower();
    gerbera.name = "Gerbera";
    gerbera.price = 50;
    gerbera.availableQuantity = 1500;
    this. myFlowerList.push(gerbera);

    let orchid = new flower();
    orchid.name = "Orchid";
    orchid.price = 50;
    orchid.availableQuantity = 1500;
    this. myFlowerList.push(orchid);

  }

  trackFlowers(index,flower){
    return flower?flower.name:undefined
  }
}
Now I will display the value of this array in my html file as below.


No comments:
Post a Comment