Related Articles

How to add code snippet in Blogger


how to add code snippet in blogger

Blogger is very powerful and widely used blogging platform developed by Google Inc. You can create very attractive and user-friendly blogs using Blogger platform almost zero cost. Blogger can be easily connected with Google AdSense to monetize your blog. Due to simplicity and overall performance of the Blogger platform, many tech guys use this platform to create their technical blogs. If you want to add programming language code snippet into Blogger, many users face issues. Since you can’t simply copy and paste or type code snippets into edit post page. Not like normal text, code snippets should be well formatted and apply correct color combinations to have good look and feel to the readers. Different programming languages use different formats and different color combinations like this.


code snippet in blogger

In this post I will introduce easy method to add code snippet into your blog post while you are editing your post itself. There are two methods you can use; you can include your code snipper into your blog post and format accordingly or use external system to embed code snippet into your blog such as GitHub Gist. But add your code snippet into your post and manually format it not practical solution. So that, I will show you how to add code snippet into your blog post and automatically identify the language you have used in the code snippet and format accordingly.


Highlight.js (Syntax highlighting for the Web), is used to automatically highlight your code syntax and format accordingly. This library supports for 190 languages and 97 styles, automatic language detection, multi-language code highlighting, available for node.js, works with any markup and compatible with any JavaScript framework.


First you need your blog to link the library along with one of the styles and calling initHighlightingOnLoad method. There are several methods you can achieve this. But with Blogger I would suggest to use CDN Hosted method, since it is straight forward less complex. In this blog also I have used same method to show code snippets.


Go to Theme and CUSTOMISE.


theme and customize blogger

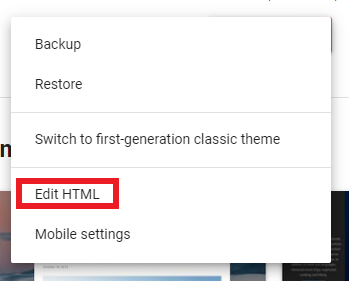
Go to Edit HTML.


edit html blogger theme


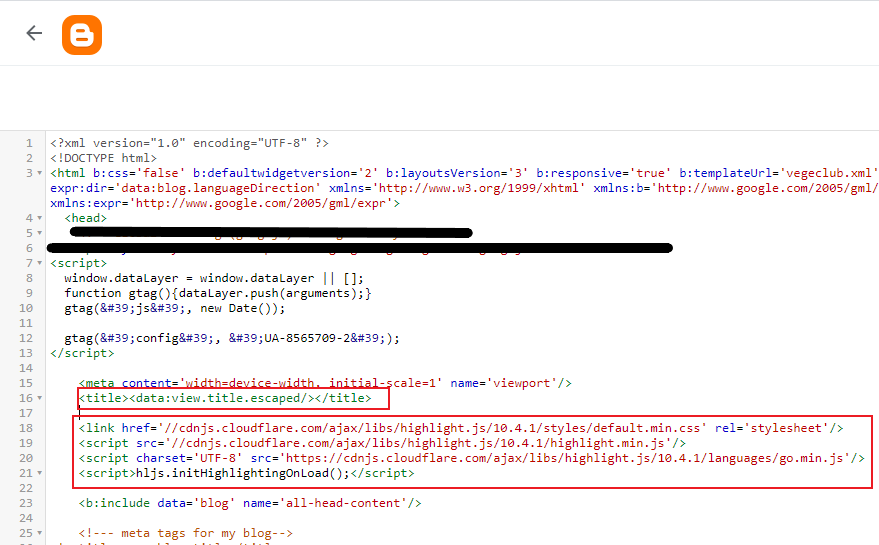
Find

<title><data:view.title.escaped/></title>
by pressing Ctrl + F and add CDN code just below this line.
<link rel="stylesheet"  href="//cdnjs.cloudflare.com/ajax/libs/highlight.js/10.4.1/styles/default.min.css"/>

<script src="//cdnjs.cloudflare.com/ajax/libs/highlight.js/10.4.1/highlight.min.js"></script>

<!-- and it's easy to individually load additional languages -->

<script charset="UTF-8"

 src="https://cdnjs.cloudflare.com/ajax/libs/highlight.js/10.4.1/languages/go.min.js"></script>

<script>hljs.initHighlightingOnLoad();</script>


add highlight.js to blogger theme


Save edited HTML code by clicking on Save button.


save blogger theme html

Now you have setup your Blogger platform to add code snippet. Then you can write your blog post and add code snippet.


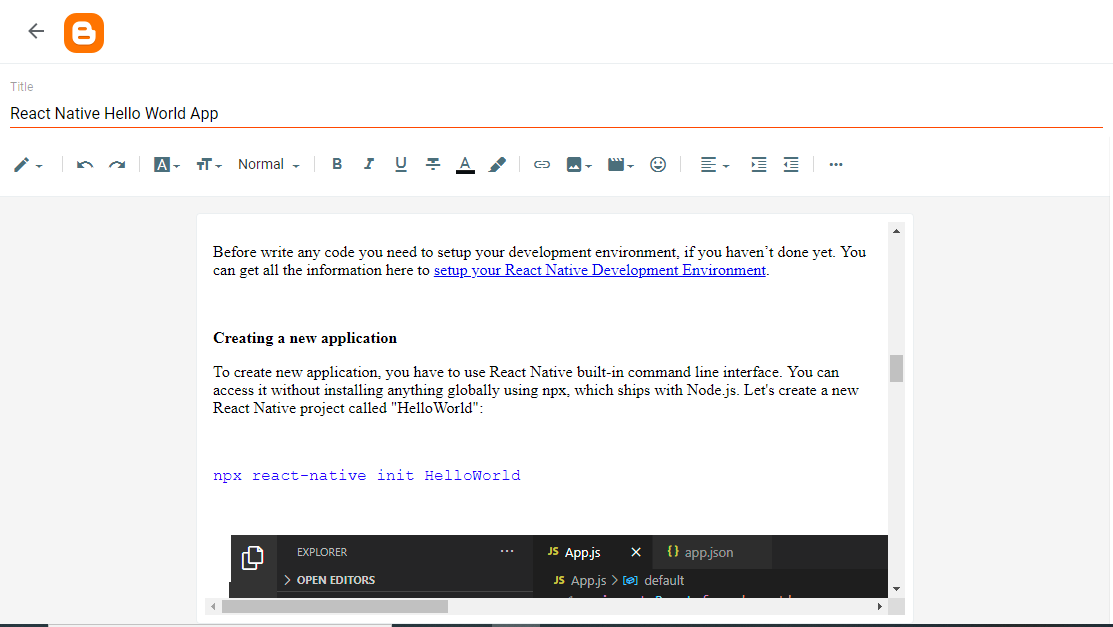
Go to add new post or edit post page of blogger.


blogger edit post page


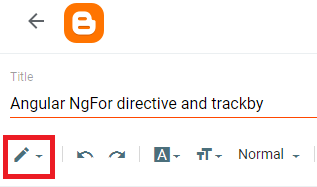
Go to HTML View.


go to html view


Click HTML View button.


click HTML View button

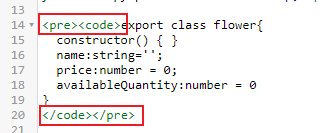
In HTML code you can code snippet to your blog post. To identify the code snippet part and automatically highlight the syntax you have to wrap your code snippet using


<pre><code> {code snippet} </code></pre>


tags.


pre code code snippet


Then Publish or Update your blog post.


You are done. Go to your blog post and see how your code snippet looks like.


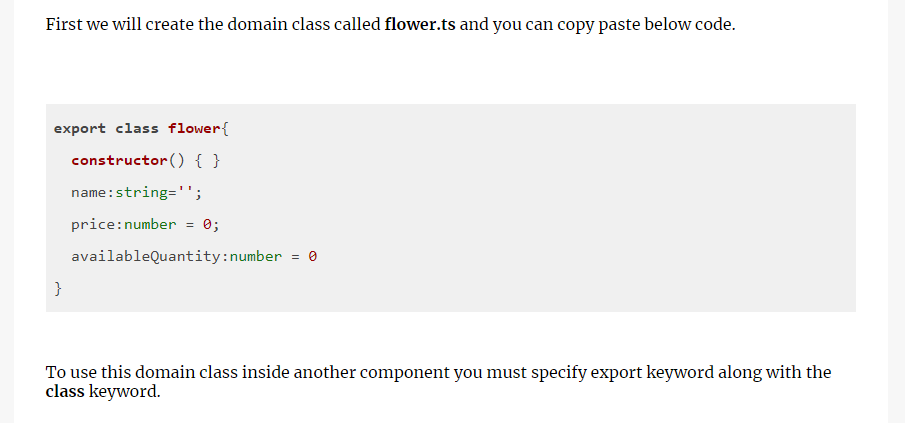
this is how your code snippet look like after highlight


Here system automatically detects the language and format accordingly. If automatic detection doesn’t work, you can specify the language in the class attribute.

<pre><code class="html">...</code></pre>


I think I explained everything and complete. However, if you find any difficulties you may specify under comments section and I will look into that.


Comments

Popular posts from this blog

The Power of ChatGPT and Whisper Models

A Deep Dive into Natural Language Processing Natural Language Processing (NLP) has seen a significant boost in recent years due to advancements in artificial intelligence and machine learning. Two models that have shown remarkable success in NLP are ChatGPT and Whisper. In this article, we will delve into the power of these models and their applications in the field of NLP. ChatGPT is a transformer-based language model developed by OpenAI that uses unsupervised learning to predict the next word in a sentence based on the context of previous words. ChatGPT is a generative model that is trained on large datasets of text, such as books and articles, and can be fine-tuned for specific tasks, such as question-answering or dialogue generation. ChatGPT is known for its ability to produce human-like text, making it an ideal tool for applications such as chatbots, content creation, and language translation. Whisper, on the other hand, is a paraphrasing model developed by Google that is based on

Building robust APIs with Node.js

Node.js is a popular open-source JavaScript runtime environment that allows developers to build scalable and high-performance web applications. One of the key strengths of Node.js is its ability to build APIs quickly and efficiently. APIs, or Application Programming Interfaces, allow different systems to communicate with each other, enabling data exchange and other operations. Building robust APIs with Node.js requires an understanding of RESTful architecture, which is a widely adopted standard for creating APIs. RESTful APIs provide a standardized way to expose data and functionality over the web using a set of HTTP methods such as GET, POST, PUT, and DELETE. To build a robust Node.js API, developers must choose an appropriate framework and set up a development environment. They should also handle errors and exceptions, implement authentication and authorization, and use middleware to enhance the functionality of the API. Writing test cases, documenting the API using tools such as Swa

DevOps automation using Python - Part 2

Please read  DevOps automation using Python - Part 1 article before this article, since this is a continuation the same. Introduction to network automation with Python and Netmiko Network automation involves automating the tasks of network devices such as switches, routers, and firewalls to improve efficiency and reduce errors. Python is a popular programming language used for network automation due to its simplicity and ease of use. Netmiko is a Python library used to automate network devices that support SSH connections. In this article, we will provide an introduction to network automation with Python and Netmiko . Setting up Python and Netmiko To get started, you will need to install Python on your machine. You can download the latest version of Python from the official website ( https://www.python.org/downloads/ ) and install it according to the installation instructions for your operating system. Once you have installed Python, you can install Netmiko using pip, a Python package