
Related Articles

Android: How to launch android emulator from command line or batch script?


Many Windows based Android developers are facing difficulties in running Android Studio on Windows machines due to lack of performance issues. But if you are developing mobile application using language like React Native you don’t actually need to work on Android Studio. But most of the time you have to use Android Emulators to test your application. If your windows machine does not have at least 16 GB of RAM you always face severe performance issue while running Android Emulators.


One solution to this issue is you can use your mobile phone to test react native application without running on Android Emulators. For that you only need to run Metro server on your PC and test application run on your mobile phone. But this method has drawbacks you have only one platform to test your application. If you want to test your application on multiple platforms you have to use several Emulators with different Android versions and architectures.


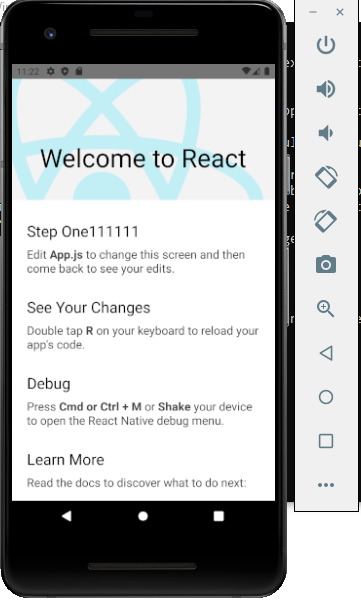
Another solution is without load your Android Studio if you can use Android Emulators alone that will give better performance. For that you can use command line to load Android Emulators.

Open command prompt anywhere and use the following command


To get the list of available emulators


emulator -list-avds


To open a emulator


emulator -avd Nexus_5X_API_23


If you have multiple emulators this method is also cumbersome process to type different command and load emulators. For that I wrote simple batch script for each emulator needs to run and simply double click on the batch script to run emulator as standalone application.

Here is the batch script file code:


C:/

cd C:\Users\<Your User>\AppData\Local\Android\Sdk\emulator

emulator -avd <Your Emulator Name>


Save this code with file name <Your File Name>.bat. Then double click on the file to run the emulator.


Example:


C:/

cd C:\Users\User\AppData\Local\Android\Sdk\emulator

emulator -avd Pixel_2_API_30


Above script run Pixel_2_API_30 emulator in “C:\Users\User\AppData\Local\Android\Sdk\emulator” path.


Happy coding….😀


Comments

Popular posts from this blog

The Power of ChatGPT and Whisper Models

A Deep Dive into Natural Language Processing Natural Language Processing (NLP) has seen a significant boost in recent years due to advancements in artificial intelligence and machine learning. Two models that have shown remarkable success in NLP are ChatGPT and Whisper. In this article, we will delve into the power of these models and their applications in the field of NLP. ChatGPT is a transformer-based language model developed by OpenAI that uses unsupervised learning to predict the next word in a sentence based on the context of previous words. ChatGPT is a generative model that is trained on large datasets of text, such as books and articles, and can be fine-tuned for specific tasks, such as question-answering or dialogue generation. ChatGPT is known for its ability to produce human-like text, making it an ideal tool for applications such as chatbots, content creation, and language translation. Whisper, on the other hand, is a paraphrasing model developed by Google that is based on

Angular PrimeNG checkboxes styling and events handling

  Getting Started With PrimeNG Styling in Angular App This chapter I am planning to show how you can handle events of the checkboxes. For that I will use checkbox for every card to place the order.  To use PrimeNG checkboxes you have to import checkbox module in app.module.ts file. import {CheckboxModule} from 'primeng/checkbox'; import { BrowserModule } from '@angular/platform-browser'; import { NgModule } from '@angular/core'; import { AppRoutingModule } from './app-routing.module'; import { AppComponent } from './app.component'; import { LandingComponent } from './modules/landing/landing.component'; import { HomeComponent } from './modules/home/home.component'; import { CardModule } from 'primeng/card'; import {CheckboxModule} from 'primeng/checkbox'; @NgModule({ declarations: [ AppComponent, LandingComponent, HomeComponent ], imports: [ BrowserModule, AppRoutingModule, CardModu

Angular NgFor directive and trackby

Today we will learn about NgFor one of the core directive of angular. NgFor helps to build list and tables in Angular   Let us see the example in our flower store app. In the landing page I am going to print list of flowers that are available in the store. Later we will add images and show them in a carousel to rotate automatically. First we will create the domain class called flower.ts and you can copy paste below code.  export class flower{ constructor() { } name:string=''; price:number = 0; availableQuantity:number = 0 } To use this domain class inside another component you must specify export keyword along with the class keyword. Flower domain has 3 attributes to store name of the flower then price and the available quantity. Now we can create the array from the flower type as below inside the landing.component.ts file. myFlowerList:flower[]=[]; I will call a method inside ngOnInit to add values to the array as below. ngOnInit is one of t