Getting Started With PrimeNG Styling in Angular App
This chapter we are going to check how you can add PrimeNG card component to show available flowers in the stock. Before styling the app, I have added some images of flowers to our assets folder as below.
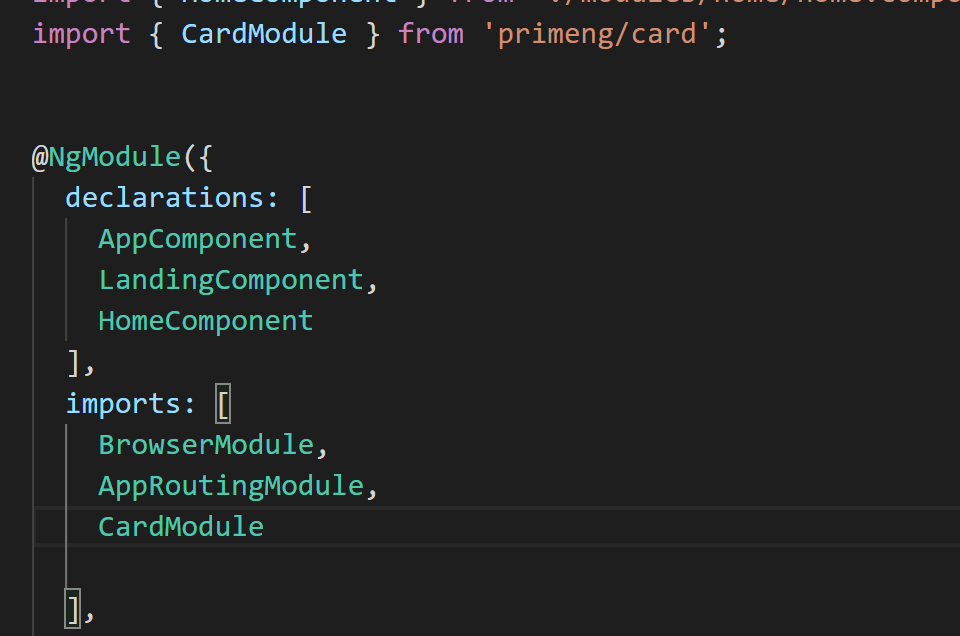
In app.module.ts file you can import PrimeNG Card module as below.
import { BrowserModule } from '@angular/platform-browser';import { NgModule } from '@angular/core';
import { AppRoutingModule } from './app-routing.module';
import { AppComponent } from './app.component';
import { LandingComponent } from './modules/landing/landing.component';
import { HomeComponent } from './modules/home/home.component';
import { CardModule } from 'primeng/card';
;
@NgModule({
declarations: [
AppComponent,
LandingComponent,
HomeComponent
],
imports: [
BrowserModule,
AppRoutingModule,
CardModule,
],
providers: [],
bootstrap: [AppComponent]
})
export class AppModule { }import { Component, OnInit } from '@angular/core';import { flower } from '../../domain/flower';
import {CardModule} from 'primeng/card';
@Component({
selector: 'app-landing',
templateUrl: './landing.component.html',
styleUrls: ['./landing.component.scss']
})
export class LandingComponent implements OnInit {
myFlowerList:flower[]=[];
constructor() { }
ngOnInit() {
this.mySellingFlowers();
}
mySellingFlowers(){
let rose = new flower();
rose.name = "Rose";
rose.price = 100;
rose.availableQuantity = 1000;
this. myFlowerList.push(rose);
let lily = new flower();
lily.name = "Lilly";
lily.price = 80;
lily.availableQuantity = 2000;
this. myFlowerList.push(lily);
let tulip = new flower();
tulip.name = "Tulip";
tulip.price = 100;
tulip.availableQuantity = 2300;
this. myFlowerList.push(tulip);
let carnation = new flower();
carnation.name = "Carnation";
carnation.price = 50;
carnation.availableQuantity = 1500;
this. myFlowerList.push(carnation);
let gerbera = new flower();
gerbera.name = "Gerbera";
gerbera.price = 50;
gerbera.availableQuantity = 1500;
this. myFlowerList.push(gerbera);
let orchid = new flower();
orchid.name = "Orchid";
orchid.price = 50;
orchid.availableQuantity = 1500;
this. myFlowerList.push(orchid);
}
}
trackFlowers(index,flower){
return flower?flower.name:undefined
}
}
Then you can use PrimeNG card module inside your component.html file as below.
<h1>Welcome to my flower store</h1>
<div *ngFor="let flower of myFlowerList;trackBy:trackFlowers">
<p-card header="{{flower.name}}" [style]="{width: '360px','float':'left','margin-bottom': '2em','margin-right': '2em','background-color':'light-pink'}" styleClass="p-card-shadow">
<img alt="Card" width="100" height="100" src="assets/stock/{{flower.name}}.jpg">
<p>Lorem ipsum dolor sit amet, consectetur adipisicing elit. Inventore sed consequuntur error repudiandae numquam deserunt
quisquam repellat libero asperiores earum nam nobis, culpa ratione quam perferendis esse, cupiditate neque quas!</p>
</p-card>
</div>
I have changed background styles in the banner in style.scss file.
@import url('https://fonts.googleapis.com/css family=Nunito:400,700&display=swap');
$primary: indianred;
body {
margin: 0;
font-family: 'Nunito', 'sans-serif';
font-size: 18px;
}
.container {
width: 80%;
margin: 0 auto;
}
header {
background: $primary;
padding: 1em 0;
a {
color: white;
text-decoration: none;
font-size: larger;
}
a.logo {
font-weight: bold;
color: white;
font-size: larger;
}
nav {
float: right;
ul {
list-style-type: none;
margin: 0;
display: flex;
li a {
padding: 1em;
color:white;
font-weight: bold;
&:hover {
background: darken($primary, 10%);
}
}
}
}
}
h1 {
margin-top: 2em;
}
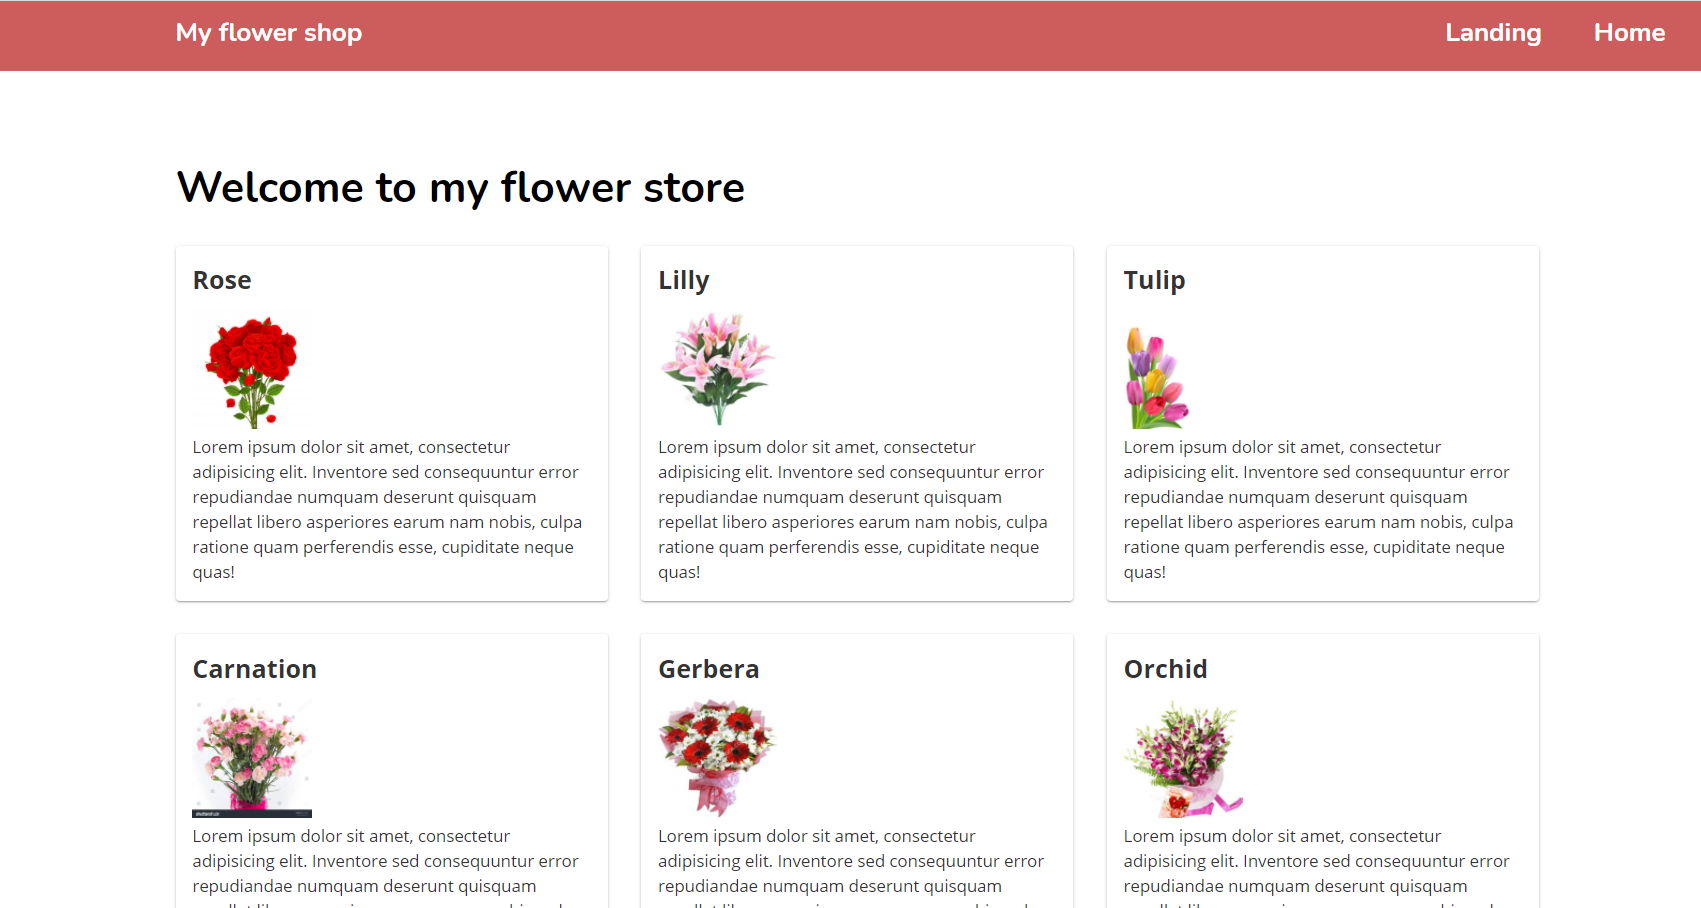
Once you apply PrimeNG cards modules, app will look like below.
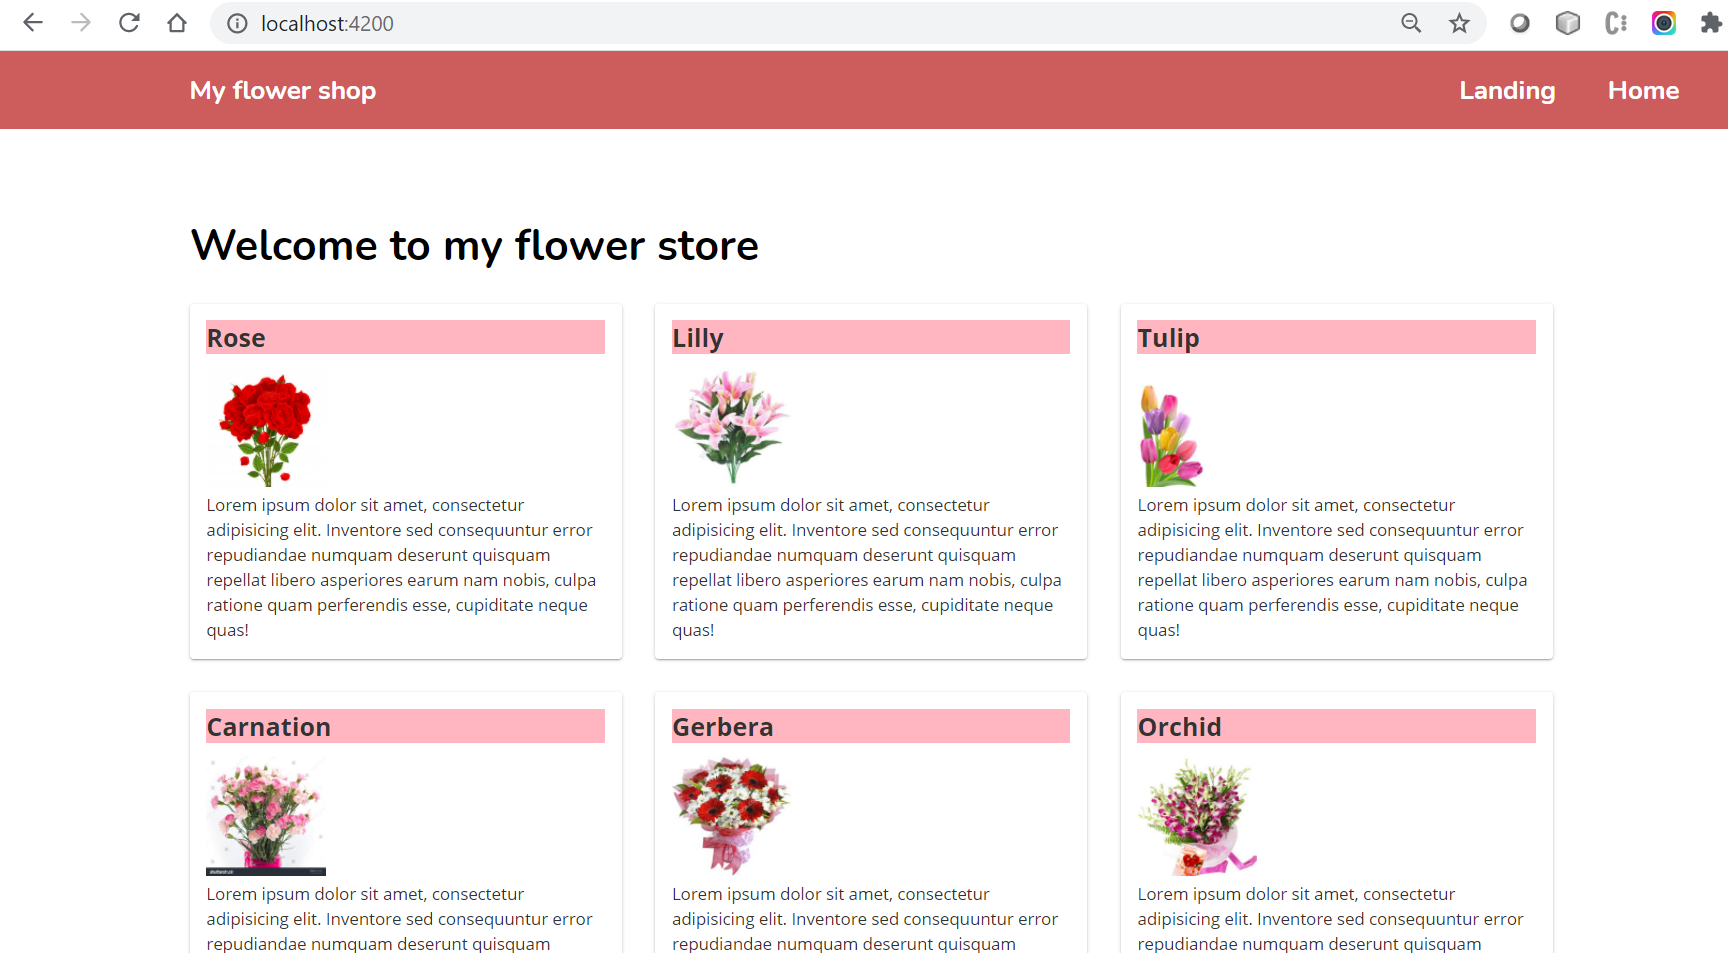
.ui-card-title{ background-color: lightpink !important;}
import { Component, OnInit, ViewEncapsulation } from '@angular/core';
import { flower } from '../../domain/flower';
import {CardModule} from 'primeng/card';

@Component({
  selector: 'app-landing',
  templateUrl: './landing.component.html',
  styleUrls: ['./landing.component.scss'],
  encapsulation: ViewEncapsulation.None
})
export class LandingComponent implements OnInit {

  myFlowerList:flower[]=[];
  constructor() { }

  ngOnInit() {
    this.mySellingFlowers();
  }

  mySellingFlowers(){
    let rose = new flower();
    rose.name = "Rose";
    rose.price = 100;
    rose.availableQuantity = 1000;
    this. myFlowerList.push(rose);

    let lily = new flower();
    lily.name = "Lilly";
    lily.price = 80;
    lily.availableQuantity = 2000;
    this. myFlowerList.push(lily);

    let tulip = new flower();
    tulip.name = "Tulip";
    tulip.price = 100;
    tulip.availableQuantity = 2300;
    this. myFlowerList.push(tulip);

    let carnation = new flower();
    carnation.name = "Carnation";
    carnation.price = 50;
    carnation.availableQuantity = 1500;
    this. myFlowerList.push(carnation);

    let gerbera = new flower();
    gerbera.name = "Gerbera";
    gerbera.price = 50;
    gerbera.availableQuantity = 1500;
    this. myFlowerList.push(gerbera);

    let orchid = new flower();
    orchid.name = "Orchid";
    orchid.price = 50;
    orchid.availableQuantity = 1500;
    this. myFlowerList.push(orchid);

  }

  trackFlowers(index,flower){
    return flower?flower.name:undefined
  }
}


Comments
Post a Comment